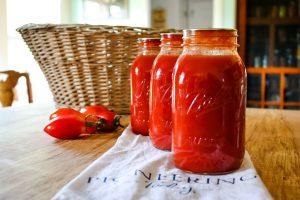
Canning your favorite summer fruits is a wonderful way to keep the bright flavors of the sunny season alive long after the leaves have started to turn brown and fall from the trees. This specific guide is all about taking the juicy sweetness of watermelon, the tropical tang of pineapple, and the mellow honey notes of cantaloupe and putting them into glass jars for safe keeping. Many people think that canning is a difficult or scary chore that only grandmothers in country kitchens can do well, but that is simply not the truth at all. This recipe is designed to be a gentle and easy introduction for anyone who wants to learn how to save food using a simple water bath method or basic syrup packing. When you open a jar of home preserved fruit in the middle of a cold January morning, you are not just eating a snack, you are tasting a memory of warm breezes and long afternoon picnics. We will walk through every single part of the process together so that you feel confident and excited to fill your pantry with colorful jars of delicious fruit.
People absolutely love this recipe because it offers a variety of textures and sugar levels that satisfy almost every kind of sweet craving without needing to buy bags of candy or processed snacks. Watermelon is famous for its refreshing water content and iconic pink color, while pineapple brings a punchy acidity that cuts through the sweetness and adds a tropical flair to any fruit salad. Cantaloupe provides a smooth and floral backbone to the mix, making the entire combination feel balanced and sophisticated yet still very family friendly. Beyond the amazing taste, there is a deep sense of pride that comes from looking at a shelf full of jars that you prepared with your own two hands. It feels like a magic trick to be able to pull a fresh tasting piece of cantaloupe out of a cupboard six months after you bought it from the local farmers market. Kids especially love these fruits because they are naturally soft and easy to chew, making them a perfect addition to school lunches or as a quick topping for a bowl of plain yogurt.
You should make this recipe right now because summer fruits are at their absolute peak of ripeness and price right now, which means they are both the tastiest and the most affordable they will be all year. From a fitness and health perspective, canning your own fruit allows you to control exactly how much sugar goes into the jar, which is something you can never really be sure of when you buy canned goods from a big grocery store. If you are trying to stay hydrated or watch your calorie intake, having pre cut fruit ready to go makes it much easier to choose a healthy option instead of reaching for a bag of salty chips or a sugary soda. Many people find the process of washing, slicing, and packing the fruit to be a very relaxing and mindful activity that helps them decompress after a busy week of work or chores. It is also a fantastic way to reduce food waste if you happen to buy a giant watermelon or too many pineapples and realize your family cannot eat them all before they start to get mushy or spoil.
The emotional connection to home canning is truly something special because it connects us to a simpler time when people had to be very careful and creative about how they stored their harvest for the winter. Giving a jar of your home canned pineapple or melon as a gift to a neighbor or a friend is a much more meaningful gesture than just buying a generic candle or a box of store bought cookies. It shows that you put time, effort, and care into creating something healthy and delicious just for them to enjoy. Every time you hear the little pop sound of a lid sealing shut, it feels like a small victory and a promise of good meals to come in the future. Whether you are a seasoned gardener with a massive backyard or someone who just loves finding great deals at the grocery store, this canning project is a joyful way to celebrate the bounty of nature. Let us get our jars ready and dive into the simple steps of preserving these three incredible fruits so we can enjoy the essence of summer all year round.
Ingredients You Will Need
To ensure success, please gather all of your supplies and ingredients before you start the heating process. You will need:
-
8 cups of fresh watermelon flesh (seeds removed and cut into 1 inch cubes)
-
6 cups of fresh pineapple (peeled, cored, and cut into 1 inch chunks)
-
6 cups of fresh cantaloupe (seeds removed and cut into 1 inch cubes)
-
4 cups of granulated white sugar (for the preserving syrup)
-
6 cups of filtered water
-
4 tablespoons of bottled lemon juice (this helps with safety and prevents browning)
-
1 teaspoon of sea salt (optional, to bring out the natural fruit sugars)
-
12 pint sized glass canning jars with brand new lids and metal rings
Step by Step Method
Step 1: Prepare the Jars and Lids
Wash your glass jars, lids, and rings in very hot soapy water. Rinse them well. Place the jars in a large pot of water and bring it to a simmer to keep them hot until you are ready to fill them. Keeping the jars hot prevents them from cracking when you add the hot fruit and syrup later.
Step 2: Prepare the Fruit
Take your watermelon, pineapple, and cantaloupe and peel them carefully. Remove all seeds and any hard parts of the rind. Cut the fruit into uniform cubes about 1 inch in size. Try to keep the sizes consistent so they all process at the same rate. Keep each fruit in a separate bowl for now.
Step 3: Make the Simple Syrup
In a large stainless steel pot, combine the 6 cups of water and 4 cups of sugar. Stir the mixture over medium heat until all the sugar has dissolved completely. Add the lemon juice and the pinch of salt. Bring the syrup to a very gentle simmer. Do not let it boil vigorously because you do not want it to thicken too much.
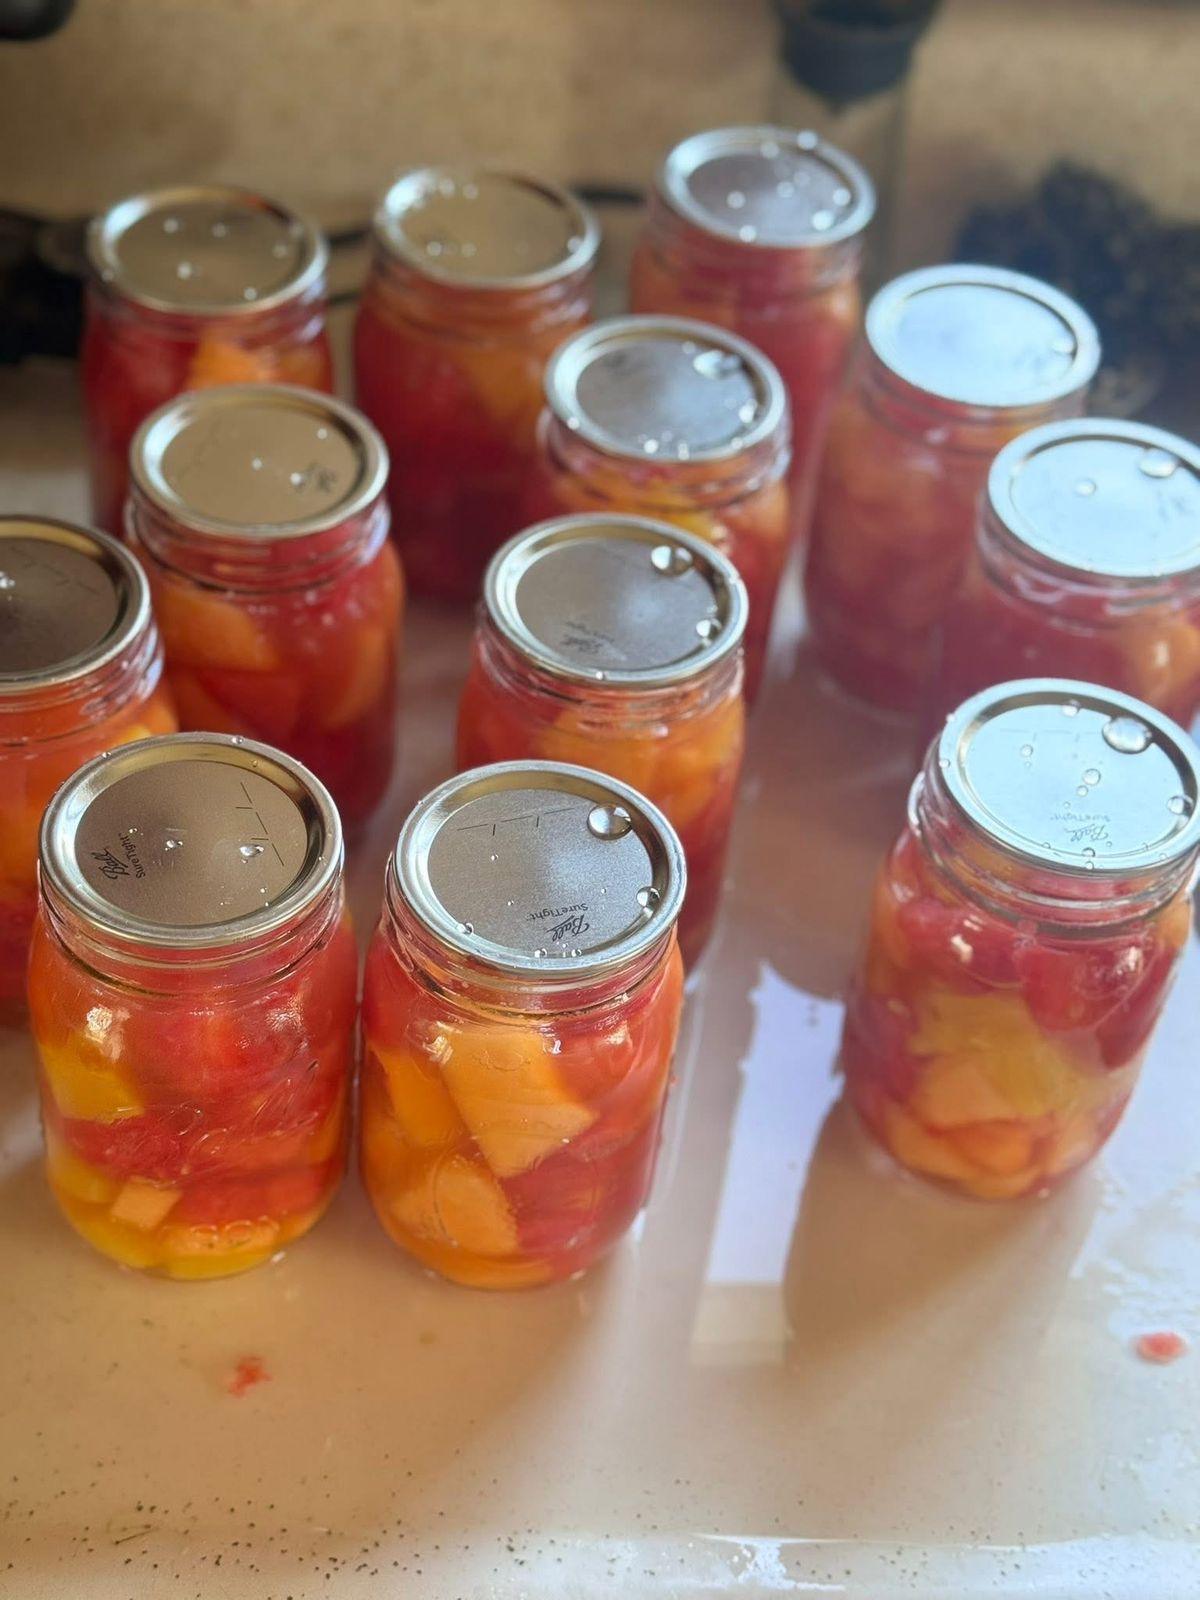
Step 4: Pack the Jars
Take one hot jar out of the water at a time. Pack the fruit cubes into the jar. You can mix the fruits together or do layers of each color for a beautiful look. Leave about 1 inch of empty space at the top of the jar. This empty space is called headspace and is very important for a good seal.
Step 5: Add the Hot Syrup
Carefully pour the hot sugar syrup over the fruit in the jar. Make sure the fruit is completely covered but maintain that 1 inch of headspace at the top. Use a small plastic spatula or a wooden skewer to gently poke the sides of the jar to release any trapped air bubbles.
Step 6: Wipe and Seal
Use a clean damp cloth to wipe the rim of the jar. Any drop of syrup on the rim might prevent the lid from sealing. Place the flat lid on the jar and screw the metal ring on until it is finger tip tight. Do not use too much force or the air cannot escape during the boiling process.
Step 7: The Water Bath
Place the filled jars into a large canning pot filled with hot water. The water should cover the tops of the jars by at least 1 or 2 inches. Bring the water to a full rolling boil. Process the jars in the boiling water for 15 minutes. Start the timer only when the water reaches a full boil.
Step 8: Cooling and Checking
After 15 minutes, turn off the heat and let the jars sit in the water for 5 minutes. Carefully remove them with a jar lifter and place them on a towel in a draft free area. Let them sit undisturbed for 24 hours. You will hear a popping sound as they seal. Check the lids the next day by pressing the center; if it does not move, the jar is sealed and ready for storage.
Why This Recipe Is Special
This recipe stands out because it brings together three distinct fruits that are rarely seen in a single jar together. Most store bought canned fruits are just peaches or pears, so this combination feels very gourmet and unique. From a health perspective, you are getting a massive dose of Vitamin C from the pineapple and Lycopene from the watermelon. These antioxidants are great for your skin and your immune system. Because you are making this at home, you can choose to use organic fruit if you prefer, ensuring that your family is eating the cleanest food possible. The taste is a perfect harmony of tart, sweet, and mellow flavors that work beautifully in desserts or as a side dish for grilled meats. It is a low fat snack that provides a quick energy boost during a long afternoon at work or school.
Extra Tips for Better Taste
-
Add Some Herbs: If you want a more adult flavor, try adding a small sprig of fresh mint or a thin slice of ginger to each jar before adding the syrup.
-
Use Fruit Juice: Instead of using plain water for your syrup, you can use unsweetened white grape juice or apple juice for a deeper fruit flavor.
-
Keep it Cold: For the best eating experience, put the jar in the refrigerator for a few hours before opening it. Cold canned fruit tastes much more refreshing than room temperature fruit.
-
Spice it Up: A tiny bit of vanilla bean or a small cinnamon stick added to the pineapple jars can create a wonderful dessert topping for vanilla ice cream.
-
Firm Fruit Only: Always choose fruit that is ripe but still firm to the touch. If the fruit is too soft or overripe, it will turn into mush during the high heat of the canning process.
Final Thoughts
Canning is a gift that you give to your future self. There is no better feeling than walking to your pantry and seeing the bright colors of summer waiting for you on a grey winter day. This recipe for watermelon, pineapple, and cantaloupe is easy, fun, and very rewarding for beginners. We hope you enjoy the process of preserving these treats as much as you enjoy eating them. Happy canning and enjoy your delicious homemade fruit.
Nutrition Details
| Nutrient | Per Serving (approx 1/2 cup) | Daily Value % |
| Calories | 95 kcal | 5% |
| Total Fat | 0.2g | 0% |
| Sodium | 10mg | 0% |
| Total Carbohydrates | 24g | 9% |
| Dietary Fiber | 1.5g | 5% |
| Sugars | 21g | 0% |
| Protein | 0.8g | 2% |
| Vitamin C | 25mg | 30% |
| Vitamin A | 850IU | 17% |
Note: Nutrition values are estimates based on fruit packed in a light sugar syrup.
Disclaimer
Please remember that every person has a different body and unique health needs. The nutritional information provided here is only an estimate and may change depending on the specific fruit you use and how much sugar you add. Home canning requires following safety rules carefully to prevent spoilage. If you have any health concerns or special dietary requirements, please talk to a doctor or a professional nutritionist before making changes to your diet. Results and tastes may vary from person to person.