Introduction
Canning apple butter is one of the most delightful ways to capture the warm taste of fall in a jar. Imagine spreading a spoonful of thick, smooth, and fragrant apple butter on a slice of freshly baked bread. The rich aroma of apples, cinnamon, and cloves fills the kitchen and brings comfort to your heart. This recipe is not just about preserving fruit; it is about preserving memories, flavors, and moments of happiness that come with each bite. When you make apple butter at home, you are creating something more meaningful than a store-bought jar. You are making love and tradition in a sweet, smooth form that lasts for months.
People love apple butter because of its deep flavor and creamy texture. It is not really butter at all, but a spread made by slowly cooking apples with sugar and spices until they become thick and glossy. The slow cooking process brings out the natural sweetness of the apples and fills your home with a cozy scent that reminds you of family gatherings, autumn walks, and holiday baking. Apple butter has been a favorite in many homes for generations because it can be used in many ways. You can spread it on toast, swirl it into yogurt, mix it into oatmeal, or even use it as a glaze for meats and pastries.
Making apple butter is a wonderful project for the fall season when apples are fresh, affordable, and full of flavor. It is also a beautiful way to use up extra apples after apple picking. The process of canning it allows you to store it safely for a long time, so you can enjoy the taste of autumn even in the middle of winter. It also makes thoughtful and charming gifts for friends and family. Every jar you give away is like sharing a little warmth and comfort from your kitchen. Whether you make it for yourself or to give as gifts, canning apple butter is a fulfilling and heartwarming experience that brings joy to everyone who tastes it.
Ingredients You Will Need
Here is a simple list of ingredients you will need to make delicious canned apple butter:
-
6 pounds of fresh apples (choose a mix of sweet and tart varieties such as Fuji, Gala, or Granny Smith)
-
2 cups of granulated sugar
-
1 cup of brown sugar
-
1 cup of apple cider or apple juice
-
1 tablespoon of ground cinnamon
-
1 teaspoon of ground nutmeg
-
1 teaspoon of ground cloves
-
½ teaspoon of salt
-
2 tablespoons of lemon juice
-
Water as needed for cooking
You will also need clean canning jars, lids, and bands for storing your apple butter. Make sure all canning equipment is properly sterilized before use.
Step by Step Method
Step 1: Prepare the Apples
Wash the apples thoroughly to remove any dirt or residue. Peel, core, and cut them into small pieces. You can use an apple peeler-corer-slicer if you have one, but a simple knife will work just as well. Make sure to remove all seeds and hard parts. The smaller you cut the apples, the faster they will cook down later.
Step 2: Cook the Apples
Place the apple pieces into a large, heavy-bottomed pot or a slow cooker. Add the apple cider or apple juice to prevent sticking. Cook the apples over medium heat until they become soft and mushy. This usually takes about 30 to 40 minutes on the stove or a few hours in a slow cooker. Stir occasionally to prevent burning and to help the apples cook evenly.
Step 3: Puree the Apples
Once the apples are soft and tender, remove them from the heat. Use an immersion blender, food processor, or regular blender to puree the mixture until it becomes smooth and creamy. Be careful while blending hot mixtures — you can let them cool slightly to avoid splattering.
Step 4: Add Sugar and Spices
Pour the pureed apples back into the pot. Add the granulated sugar, brown sugar, cinnamon, nutmeg, cloves, salt, and lemon juice. Stir everything together until well mixed. The mixture will smell wonderful at this stage.
Step 5: Cook Until Thick
Now comes the most important part — slow cooking. Simmer the mixture on low heat, stirring often so it does not stick to the bottom of the pot. The apple butter will start to thicken as the liquid evaporates. This process may take two to three hours on the stove or longer in a slow cooker. You will know it is ready when it becomes thick enough to stay on a spoon without running off easily. Another way to test it is to place a small amount on a plate; if no liquid seeps around the edges, your apple butter is ready.
Step 6: Sterilize the Jars
While the apple butter is cooking, sterilize your canning jars and lids. Place them in a large pot of boiling water for at least 10 minutes. This step ensures that no bacteria or germs remain, which helps preserve your apple butter safely for months.
Step 7: Fill the Jars
Carefully ladle the hot apple butter into the warm, sterilized jars, leaving about half an inch of space at the top. Wipe the rims clean with a damp cloth to make sure the lids will seal properly. Place the lids on top and screw on the bands until they are snug but not too tight.
Step 8: Process the Jars
Place the filled jars into a boiling water canner. Make sure the jars are covered with at least one inch of water. Bring the water to a rolling boil and process the jars for 10 to 15 minutes. The time may vary depending on your altitude, so check local canning guidelines if needed.
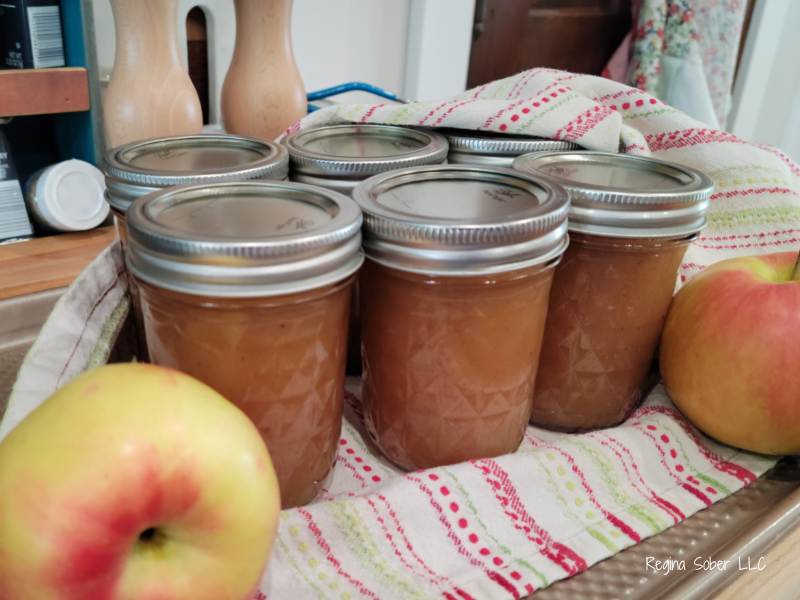
Step 9: Cool and Store
After processing, carefully remove the jars from the water and place them on a towel to cool. As they cool, you will hear a popping sound — that means the jars are sealing properly. Once completely cool, check each lid to make sure it is sealed tightly. Store the jars in a cool, dark place. Properly canned apple butter can last up to a year.
Why This Recipe Is Special
This canning apple butter recipe is special because it brings together the goodness of nature and the comfort of home cooking. It uses simple ingredients but delivers a rich and luxurious flavor that feels like a treat. Apples are naturally full of fiber, vitamins, and antioxidants that are good for your body. When you make apple butter at home, you can control the amount of sugar and avoid artificial preservatives, making it a healthier choice than many store-bought spreads.
The taste of apple butter is something truly unique. It is sweet, but not too sweet, and has deep, warm flavors from the spices. The smooth, silky texture makes it perfect for spreading on toast, pancakes, or biscuits. You can even use it as a topping for ice cream or stir it into smoothies for a flavor boost. Every spoonful tastes like fall, with hints of apple pie and caramelized sweetness.
Another reason this recipe stands out is its versatility. You can adjust the spices to match your personal taste. Some people love a stronger cinnamon flavor, while others prefer a little more nutmeg or cloves. You can even make a sugar-free version by replacing sugar with natural sweeteners. And because it is canned, it stays fresh for a long time, allowing you to enjoy the taste of autumn all year round.
Extra Tips for Better Taste
-
Choose the right apples: Mixing sweet and tart apples gives the best flavor balance. Try using varieties like Honeycrisp, Fuji, and Granny Smith together.
-
Cook slowly: The longer you cook it, the deeper the flavor becomes. Low and slow heat helps bring out the natural sweetness and gives your apple butter a rich color.
-
Add a splash of vanilla: A teaspoon of pure vanilla extract can add a lovely depth of flavor and enhance the aroma.
-
Use apple cider instead of water: Apple cider adds extra flavor and sweetness compared to plain water.
-
Taste as you go: Everyone’s taste buds are different. Adjust the sugar and spices to make it perfect for your family.
-
Smooth or chunky: For extra texture, you can leave a few small apple pieces instead of blending everything completely smooth.
-
Gift idea: Pour apple butter into small jars, decorate them with ribbons and tags, and give them as homemade gifts. They make wonderful holiday presents.
-
Try different spices: Add a pinch of cardamom or allspice for a unique twist.
-
Refrigerate opened jars: Once you open a jar, keep it in the refrigerator to maintain freshness.
Final Thoughts
Canning apple butter is more than just a recipe — it is a cozy experience that connects you to the heart of homemade cooking. The process may take time, but the result is absolutely worth it. Each jar holds the sweet taste of apples, the warmth of spices, and the comfort of tradition. It is a simple way to enjoy nature’s sweetness and share it with others. Whether you are making it for your family breakfasts, spreading it on warm bread, or giving it as a thoughtful gift, apple butter always brings smiles.
When you take that first taste of your homemade apple butter, you will feel proud and happy knowing that you created something with your own hands. It is a reminder that some of the best things in life take time, patience, and a touch of love. So gather your apples, put on some cozy music, and let the smell of spiced apples fill your kitchen. You will not just be making apple butter — you will be making memories.
Nutrition Details
| Nutrient | Per Recipe (Approx.) | Per Serving (1 Tablespoon) |
|---|---|---|
| Calories | 850 kcal | 35 kcal |
| Total Fat | 0.5 g | 0.02 g |
| Sodium | 500 mg | 20 mg |
| Total Carbohydrates | 220 g | 9 g |
| Dietary Fiber | 10 g | 0.5 g |
| Sugars | 180 g | 7 g |
| Protein | 1 g | 0.05 g |
| Vitamin C | 30 mg | 1.5 mg |
| Calcium | 40 mg | 2 mg |
| Iron | 1 mg | 0.05 mg |
Note: The values are approximate and may vary based on the apple variety and sugar amount used.
Disclaimer
This recipe is shared for general information and enjoyment. Everyone’s body is different, and results may vary based on individual health, diet, and activity levels. If you have specific dietary concerns or medical conditions, please consult a qualified health professional before making changes to your diet. Always use fresh ingredients and follow safe canning practices to ensure the best results.