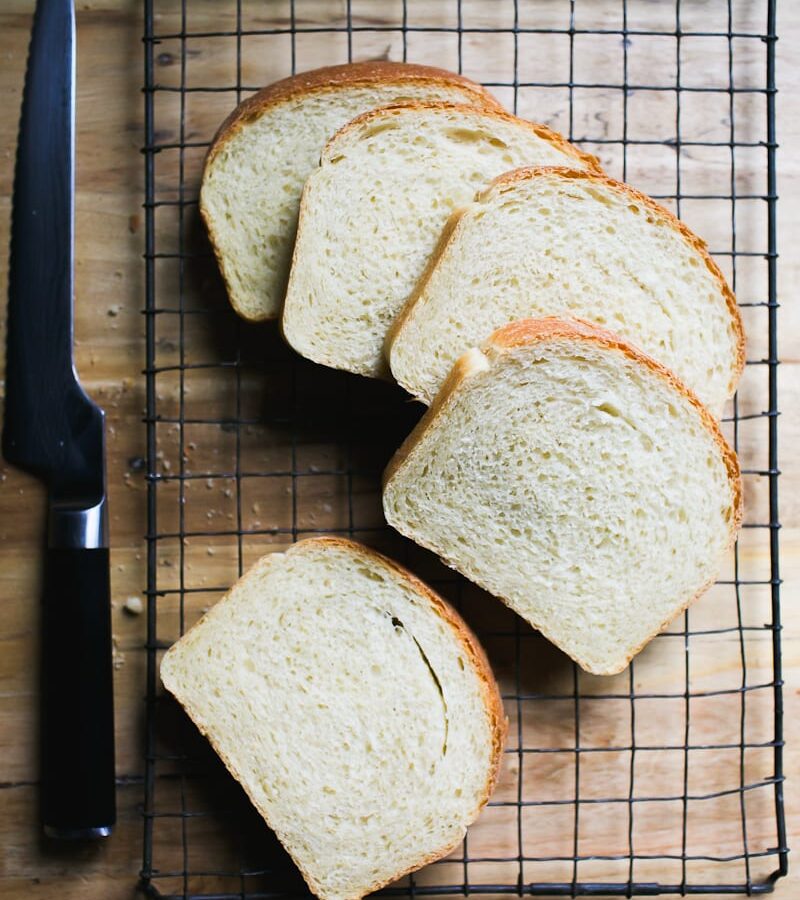
Welcome to the wonderful world of homemade sourdough sandwich bread where every single slice brings a warm smile to your face. If you have ever wanted to bake your very own loaf of soft and fluffy bread right in your own kitchen using simple natural ingredients then you are in the exact right place. This recipe is all about taking your regular baking routine and turning it into something magical and deeply rewarding. We are going to make a gorgeous loaf of sourdough sandwich bread that has a tender crumb and a soft golden crust instead of a tough and crusty artisan boule. This means you can finally make the ultimate grilled cheese sandwich or the most comforting peanut butter and jelly sandwich you have ever tasted using bread that you created completely from scratch.
People all around the world completely fall in love with this specific recipe because it combines the rich and tangy flavor of wild sourdough fermentation with the soft texture you need for a proper sandwich. Regular artisan sourdough is wonderful for dipping in olive oil or serving alongside a cozy bowl of soup but it can sometimes be too chewy or hard to bite into when you want a nice and gentle sandwich. This recipe solves that tiny problem by adding just a touch of honey and butter to the dough which keeps the crumb incredibly soft and tender for days. You will love watching your active sourdough starter work its slow magic to transform simple flour and water into a living dough that smells fresh and bubbly before it even goes into the hot oven.
There are so many wonderful moments in life when making this homemade bread feels like the absolute best decision you could possibly make. You might want to bake a fresh loaf over the lazy weekend so you have delicious breakfast toast ready for busy Monday mornings when you need a comforting start to your day. Perhaps you are looking for a healthier alternative to store bought bread brands that are filled with strange preservatives and artificial ingredients you cannot even pronounce. Baking your own bread gives you total control over every single item that goes into your body while filling your entire house with the most incredible and mouthwatering aroma that welcomes everyone home with open arms.
Taking on this baking project is also a wonderful way to slow down and practice a bit of kitchen mindfulness in our busy modern lives. The process teaches you patience because wild yeast takes its own sweet time to rise without any chemical helpers rushing the journey along. When you finally pull that tall golden loaf out of your oven and listen to it sing as it cools on the wire rack you will feel a rush of pure joy and accomplishment. Let us roll up our sleeves and dive right into the wonderful steps required to make the best sourdough sandwich bread you will ever try in your life.
Ingredients You Will Need
-
Active and bubbly sourdough starter: one half cup (120 grams)
-
Warm water: one cup plus two tablespoons (260 milliliters)
-
Honey or maple syrup: two tablespoons (30 grams)
-
Unsalted butter softened to room temperature: three tablespoons (42 grams)
-
All purpose flour or bread flour: four cups (500 grams)
-
Fine sea salt: one and one half teaspoons (9 grams)
-
Extra melted butter for brushing the crust after baking: one tablespoon (14 grams)
Step by Step Method
Step One: Feed Your Sourdough Starter
Before you begin making your bread dough you must make sure your sourdough starter is active and bubbly. Feed your starter equal parts flour and water about four to six hours before you plan to start mixing. You will know it is completely ready to use when it has doubled in size and floats when you drop a small spoonful into a glass of room temperature water.
Step Two: Mix the Main Dough
Take a large mixing bowl and combine your warm water along with the bubbly sourdough starter and honey. Stir everything together gently using a wooden spoon until the starter is fully dissolved in the liquid. Add your softened butter and flour and salt right into the bowl. Mix everything together with your hands or a sturdy spoon until no dry flour remains and a shaggy dough forms. Cover the bowl with a clean damp kitchen towel and let it rest on your counter for about forty-five minutes. This resting phase is called autolyse and it allows the flour to fully absorb the liquid and begin building natural gluten strength.
Step Three: Knead and Stretch the Dough
After the resting period you want to build more strength in your dough by doing a series of stretches and folds. Grab the edge of the dough and pull it up gently then fold it over the center toward the other side. Rotate your bowl a quarter turn and repeat this pulling and folding motion four to six times total. Cover the bowl again and let it rest for thirty minutes. Repeat this simple stretch and fold routine three more times with thirty minute intervals between each set. You will notice the dough getting smoother and more elastic with each round.
Step Four: The First Bulk Rise
Once your stretching sessions are complete cover the mixing bowl securely with plastic wrap or a snug fitting lid. Leave the bowl in a warm spot in your kitchen and let the dough rise slowly until it has increased in volume by about fifty to seventy percent. This bulk fermentation stage can take anywhere from four to eight hours depending entirely on how warm your room is. Do not rush this step because this is where the wonderful sourdough flavor develops and the natural air bubbles form inside the dough.
Step Five: Shape the Loaf
Turn your fermented dough out onto a clean lightly floured kitchen counter. Gently press the dough out into a rough rectangular shape with your fingertips to release any large pockets of gas. Roll the rectangle up tightly starting from the short end just like you would roll up a sleeping bag to create a smooth cylinder shape. Pinch the bottom seam firmly with your fingers to seal it closed so the loaf keeps its nice shape during baking.
Step Six: The Second Rise in the Pan
Generously grease a standard nine by five inch loaf pan with a bit of butter or vegetable oil to prevent sticking. Place your shaped dough seam side down right into the prepared loaf pan and press it gently into the corners. Cover the pan loosely with a plastic bag or a damp towel and let it rise at room temperature until the dough crests nicely over the top edge of the pan. This second rise usually takes about three to five hours depending on your room temperature.
Step Seven: Bake to Perfection
Preheat your oven properly to 375 degrees Fahrenheit (190 degrees Celsius) about twenty minutes before your dough finishes its second rise. Place your loaf pan on the center rack of the preheated oven. Bake the bread for approximately thirty five to forty minutes until the top crust turns a deep golden brown color and the internal temperature reaches 200 degrees Fahrenheit. If you notice the top getting too dark too quickly during the bake you can loosely tent a piece of aluminum foil over the loaf.
Step Eight: Cool and Slice
Carefully remove the hot loaf pan from the oven using thick oven mitts. Let the bread rest inside the pan for about ten minutes so it can firm up. Gently turn the loaf out of the pan onto a wire cooling rack and brush the top crust with a little melted butter for extra shine and softness. Allow the bread to cool completely for at least two hours before attempting to slice into it with a serrated bread knife. Cutting into hot bread can make the crumb gummy so patience here pays off with the best possible texture.
Why This Recipe Is Special
This lovely bread stands out from standard store bought loaves because it relies entirely on wild fermentation rather than commercial instant yeast. Fermentation breaks down the complex starches and natural proteins present in the wheat flour which makes the bread much easier for your body to digest. Many people who feel sensitive to regular factory made white bread find that they can enjoy traditional sourdough with total comfort and zero bloating.
The taste profile is another huge reason to fall completely in love with this specific recipe. You get a very gentle and pleasant hint of sourdough tang that balances out the subtle sweetness from the honey and the rich creaminess from the butter. The crumb texture is light and fluffy instead of dense and heavy which means your morning avocado toast or afternoon turkey sandwich will feel like something you ordered at a fancy local cafe.
Extra Tips for Better Taste
-
Add a quarter cup of rolled oats or sunflower seeds directly into the dough during the mixing phase if you love a nutty crunch in every bite.
-
Make sure your butter is truly softened to room temperature before adding it so it blends smoothly into the dough without creating greasy pockets.
-
If your kitchen is naturally cool during the winter months you can place your dough inside the oven with the interior light turned on to create a cozy warm proofing box.
-
Store your completely cooled loaf in a linen bread bag or a paper bag on your counter to keep the crust nice and crisp for the first couple of days.
-
Toast your leftover slices in a skillet with a tiny pat of butter to revive that fresh out of the oven magic whenever you want a warm snack.
Final Thoughts
Baking your very own loaf of sourdough sandwich bread is a deeply satisfying journey that connects you with traditional kitchen crafts in the most wonderful way. Do not worry if your very first loaf does not look like a picture from a magazine because every single bake teaches you something new about flour and water and wild yeast. Enjoy the lovely process of feeding your starter and watching your dough transform into something truly nourishing for the people you love. Have an absolute blast baking in your kitchen and may every single slice you share bring warmth and happiness to your table.
Nutrition Details
Here is a helpful nutrition breakdown for this homemade sourdough sandwich bread recipe based on standard serving sizes. Please remember that exact nutritional values can vary slightly depending on the specific brands of flour and ingredients you choose to use in your kitchen.
| Nutrient Category | Amount Per Serving | Daily Value Percentage |
| Serving Size | 1 slice (approx 50g) | N/A |
| Calories | 140 kcal | 7 percent |
| Total Fat | 3.5 g | 5 percent |
| Saturated Fat | 2.0 g | 10 percent |
| Sodium | 180 mg | 8 percent |
| Total Carbohydrates | 24 g | 9 percent |
| Dietary Fiber | 1.5 g | 6 percent |
| Sugars | 2.0 g | N/A |
| Protein | 4.0 g | 8 percent |
Disclaimer
The nutritional information and health points provided in this article are intended solely for general informational and educational purposes. Every single human body is completely unique with different dietary needs and health conditions so individual results and physical responses may vary. If you have specific medical concerns or severe food allergies you should always consult with a qualified healthcare professional or a registered dietitian before making significant changes to your daily diet.