The dream of having a quick meal ready in seconds is something we all share especially during those busy weeks when time feels like it is slipping through our fingers. Canning chicken salad is a brilliant way to make sure that you always have a high quality protein source sitting on your pantry shelf waiting for you. This recipe is not just about saving time though it is about capturing the peak flavor of fresh poultry and preserving it so that the taste remains perfect for months or even years. When you open a jar of home preserved chicken you are getting something much better than the bland tins you find at the local grocery store because you controlled every single ingredient that went into the jar. Beginners often feel intimidated by the idea of pressure canning meat but this process is actually very straightforward once you understand the basic safety rules and the simple rhythm of the kitchen.
People absolutely love this recipe because it offers a level of convenience that is hard to match with any other type of meal preparation technique. Imagine coming home after a long day of work or a tiring session at the gym and knowing that you do not have to cook a single thing to get a healthy dinner on the table. You just pop the lid of your jar and mix the tender meat with a few fresh items like celery or grapes and you have a gourmet meal in less than two minutes. The texture of canned chicken is surprisingly soft and it shreds with almost no effort which makes it the ideal base for a creamy salad. It is also a fantastic way to save money because you can buy large amounts of chicken when it is on sale and lock in those low prices by canning it immediately.
You should consider making this recipe when you want to feel a sense of security and preparedness in your daily life because a full pantry is a great stress reliever. There is a deep emotional satisfaction that comes from looking at rows of beautiful glass jars filled with food that you prepared with your own two hands for your family. From a fitness perspective this is a total game changer for anyone who is trying to track their protein intake or maintain a clean diet without spending hours in the kitchen every single day. The taste is clean and savory without any of the strange metallic aftertastes or chemical preservatives that often plague commercial canned goods found in the supermarket. It is the ultimate comfort food because it reminds us of simpler times when people took the time to preserve the harvest and care for their future needs.
This specific method focuses on the raw pack or hot pack technique which ensures that the chicken stays juicy and does not become dry during the intense heat of the pressure canning process. Whether you are a seasoned homesteader or a total novice who just bought their first pressure canner today this guide will walk you through every tiny detail. We are going to focus on simple words and clear instructions because cooking should be fun and approachable for everyone regardless of their skill level. By the time you finish reading this article you will have the confidence to fill your cupboards with delicious jars of chicken salad base that will make your lunchtime much more exciting. Get your jars ready and your apron on because we are about to embark on a preserving journey that will change the way you think about fast food forever.
Ingredients You Will Need
-
5 pounds of fresh boneless skinless chicken breasts or thighs
-
2 tablespoons of coarse sea salt or canning salt
-
4 cups of filtered water or organic chicken broth
-
1 teaspoon of black pepper for every jar
-
5 cloves of fresh garlic sliced into thin pieces
-
1 large white onion chopped into small cubes
-
4 stalks of fresh celery sliced into small bits
-
1 tablespoon of lemon juice for every quart jar
-
7 pint sized glass canning jars with new lids and rings
Step by Step Method
The very first thing you need to do is wash your glass jars in hot soapy water to make sure they are perfectly clean. You do not need to sterilize them in boiling water for pressure canning but they must be warm and free of any dirt or dust. While your jars are drying you should take your chicken and cut it into small cubes of about one inch in size. Try to remove any large pieces of fat or gristle because these do not always canned well and can make the finished product look messy. Once your meat is cut you can choose to either pack it raw or brown it slightly in a pan for extra flavor. For this recipe we will use the raw pack method because it is faster and keeps the chicken very moist.
Now you will take your clean jars and start filling them with the cubed chicken pieces. Pack the meat down gently but do not smash it too hard because you want the heat to be able to circulate around the food. Leave about one inch of empty space at the top of the jar which is called headspace. This space is very important because it allows the food to expand while it is cooking under pressure. Add your salt and pepper and a bit of onion and garlic to each jar for a boost of flavor. If you are using broth instead of water pour the liquid over the meat until it reaches that same one inch line of headspace.
Use a small plastic tool or a wooden spoon to bubble the jars by sliding it down the sides to release any trapped air. This prevents the jars from breaking and ensures a better seal. Take a clean damp cloth and wipe the rim of every jar to remove any grease or salt because even a tiny bit of residue can stop the lid from sealing. Place the flat lids on the jars and screw the metal rings on until they are just finger tight. Do not use all your strength to tighten them because air needs to escape during the canning process.
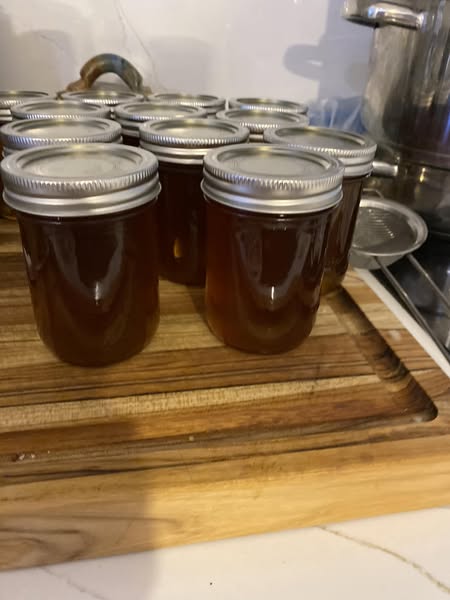
Place the jars into your pressure canner which should have about two or three inches of warm water at the bottom already. Close the lid of the canner and turn on the heat. Let the steam escape from the vent for ten minutes before you put the weight on. Once the weight is on wait for the pressure to reach 10 pounds if you are at sea level or 15 pounds if you live in high mountains. Process the pint jars for 75 minutes. When the time is up turn off the heat and let the pressure drop to zero naturally. Never try to force the canner open early. Once it is safe open the lid and let the jars sit inside for five minutes before moving them to a towel on your counter to cool for 24 hours.
Why This Recipe Is Special
This recipe is special because it gives you total control over the quality of your food which is something we rarely have in the modern world. You are using fresh meat and natural spices without any of the hidden sugars or artificial thickeners found in store bought cans. It is also a very healthy option because it is high in lean protein and low in unhealthy fats which makes it perfect for a balanced diet. The taste is much more vibrant and homey than anything you could buy at a shop.
Another reason this method stands out is the incredible convenience it provides for busy families and individuals. Having a shelf full of these jars means you can have a protein rich meal in the time it takes to toast a piece of bread. It is also an excellent way to reduce food waste because you can preserve chicken before it goes bad in the fridge. This recipe fosters a sense of independence and skill that connects you to the traditions of home cooking while using modern safety standards.
Extra Tips for Better Taste
To make your chicken salad even better you should think about how you mix it after you open the jar. Always drain the liquid from the jar first and save it for making soup later as it is full of nutrients. Mix the shredded chicken with a bit of Greek yogurt instead of heavy mayo if you want a lighter and tangier taste. Adding crunchy elements like toasted walnuts or sliced almonds right before serving provides a wonderful contrast to the soft meat.
You can also experiment with different spices inside the jars during the canning process. Adding a small sprig of fresh rosemary or thyme can give the meat a lovely herbal aroma that permeates every bite. If you like a bit of heat try adding a pinch of dried red chili flakes to each jar. Some people even like to add a tiny bit of turmeric for a beautiful golden color and added health benefits. Always remember to use fresh ingredients for the best results.
Final Thoughts
Canning your own chicken salad base is one of the most rewarding things you can do in your kitchen. It saves you time and money and provides a delicious meal that you can feel good about eating. Once you hear that first pop of a sealing lid you will feel a great sense of accomplishment. We hope this guide helps you start your canning journey with ease and joy. Happy preserving to you and your family as you fill your pantry with goodness.
Nutrition Details
| Nutrient | Amount Per Serving |
| Calories | 165 |
| Total Fat | 4 grams |
| Saturated Fat | 1 gram |
| Cholesterol | 70 milligrams |
| Sodium | 350 milligrams |
| Total Carbohydrates | 1 gram |
| Dietary Fiber | 0 grams |
| Sugars | 0 grams |
| Protein | 31 grams |
Disclaimer
Please remember that every person has a different body and different health needs. The results of this recipe and its nutritional impact may change depending on the specific ingredients you choose and your own physical condition. It is always a good idea to talk to a doctor or a food safety expert if you have questions about home food preservation. Safety is the most important part of canning so please follow all instructions carefully.