The idea of canning a cheesecake might sound like a dream or a kitchen miracle to many people because we usually think of cakes as items that must be eaten immediately or kept in the fridge for just a few days. This recipe is all about changing that mindset by showing you how to capture the rich and creamy essence of a classic New York style dessert inside a glass jar that stays fresh for much longer than a standard cake ever could. When you dive into this process you are learning a unique skill that combines the art of high quality baking with the science of food preservation so you can enjoy a luxury treat whenever the craving strikes without needing to start your oven from scratch every single time. It is a wonderful project for anyone who loves the thick and velvety texture of cream cheese mixed with sugar and vanilla but also wants the convenience of a grab and go snack that feels like a gourmet experience. By following this method you will create individual portions that are perfectly controlled and ready to serve at a moments notice which makes it a game changer for busy families or anyone who loves to have a secret stash of sweets hidden in their pantry for a rainy day.
People absolutely love this recipe because it solves the biggest problem with cheesecake which is how quickly it usually goes bad or loses its texture in the refrigerator. When you bake these little jars you are creating a sense of nostalgia and comfort because there is something deeply satisfying about opening a vacuum sealed lid to find a perfectly set and smooth dessert waiting just for you. The love for this treat also comes from the fact that it is incredibly portable and giftable meaning you can hand a beautiful jar to a neighbor or a friend and they will be amazed that you made something so professional and tasty right in your own home kitchen. There is a certain magic in the way the heat of the water bath interacts with the cream cheese batter inside the jar to create a dense and silky consistency that is often even better than what you find in expensive bakeries or high end restaurants. It is a crowd favorite because it looks elegant with its clean layers and pale golden top yet it feels humble and rustic since it is served in a traditional mason jar which reminds people of simpler times and homemade goodness.
You should make this recipe when you want to celebrate a special occasion but do not want the stress of baking a giant cake on the actual day of the party or event. It is also an emotional choice for those who find comfort in food because having a shelf stable or long lasting sweet treat provides a sense of security and joy during a long week at work or after a tiring day of chores. From a fitness perspective these jars are excellent because they provide built in portion control which helps you enjoy the full fat and full flavor experience of a real dessert without the risk of overeating a massive slice from a large springform pan. If you are someone who enjoys hiking or camping these jars are a brilliant way to bring a touch of luxury to the great outdoors because they are sturdy and easy to pack without worrying about the cake getting squished or melting in the heat. Whether you are making them for a holiday gift or just because you want your house to smell like warm vanilla and sweet cream this recipe fits into every lifestyle by being both a decadent indulgence and a practical solution for modern living.
The taste of this preserved cheesecake is truly second to none because the flavors have time to meld and deepen inside the sealed environment of the glass jar. Unlike a regular cake that might dry out as it sits in the open air these jars lock in every bit of moisture and aroma so that the first bite is just as fresh as the last one. You will find that the subtle tang of the cream cheese is perfectly balanced by the sweetness of the sugar and the warmth of the vanilla extract to create a profile that is sophisticated yet very easy for any palate to appreciate. Making this recipe is an act of love for yourself and your family because it ensures that a high quality and delicious dessert is always within reach regardless of how busy or tired you might be. It is the ultimate kitchen hack for the modern home cook who wants to impress guests with something unique while also enjoying the peace of mind that comes from a well stocked and organized pantry full of homemade treasures.
Ingredients You Will Need
To make these delicious canned cheesecakes you will need the following items prepared and measured out. Please ensure all your dairy items are at room temperature before you begin.
-
24 ounces of full fat cream cheese (three standard blocks)
-
1 cup of granulated white sugar
-
3 large farm fresh eggs
-
1 tablespoon of pure vanilla extract
-
1 teaspoon of fresh lemon juice
-
1 cup of graham cracker crumbs
-
4 tablespoons of melted unsalted butter
-
Half a teaspoon of salt
-
12 wide mouth half pint canning jars with new lids and rings
-
Boiling water for the water bath
Step by Step Method
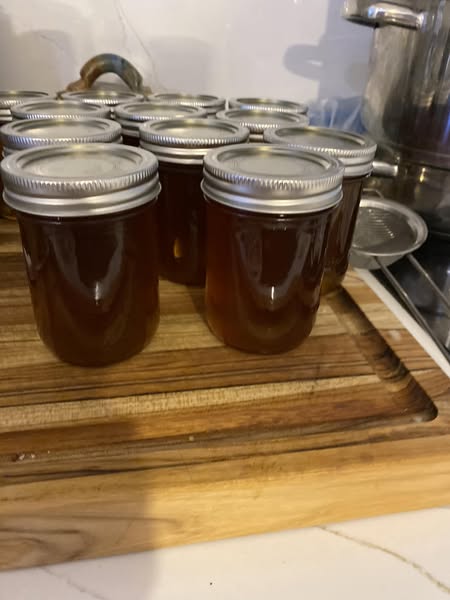
Step One: Prepare Your Jars
Begin by washing your jars and lids in hot soapy water to ensure they are perfectly clean. Rinse them well and keep them warm so they do not crack when you add the hot batter later. You can keep them in a pot of warm water or a low oven while you work on the filling.
Step Two: Make the Crust
In a medium bowl combine your graham cracker crumbs with the melted unsalted butter and a pinch of salt. Stir them together until the mixture looks like wet sand. Put about two tablespoons of this mixture into the bottom of each clean jar and press it down firmly using a small spoon or a clean thumb to create a solid base.
Step Three: Cream the Cheese
In a large mixing bowl beat the room temperature cream cheese until it is very smooth and has no lumps. It is important that the cheese is soft so you get a silky texture. Slowly add the granulated sugar and continue to mix on a medium speed until the mixture is fluffy and well combined.
Step Four: Add the Liquids
Pour in the vanilla extract and the lemon juice while you keep mixing at a low speed. These ingredients add a bright flavor that cuts through the richness of the cheese. Scrape down the sides of the bowl with a spatula to make sure everything is being incorporated evenly.
Step Five: Incorporate the Eggs
Add your eggs one at a time to the batter. Mix very gently after each egg just until it disappears into the cream. You do not want to whip too much air into the batter at this stage because air bubbles can cause the cheesecake to puff up and then sink or crack during the baking process.
Step Six: Fill the Jars
Carefully pour or spoon the cheesecake batter into each jar over the crust. Leave about one inch of space at the top of the jar which is called headspace. This space is vital because the cake will expand slightly as it cooks and you need room for the seal to form properly.
Step Seven: Prepare for Baking
Place the jars into a large deep baking pan or a roasting pan. Fill the pan with hot water until the water reaches about halfway up the sides of the jars. This is called a bain marie or a water bath and it helps the cheesecake cook slowly and evenly without burning.
Step Eight: The Cooking Process
Place the pan in a preheated oven at 325 degrees Fahrenheit. Bake them for about thirty to thirty five minutes. The centers should still have a slight jiggle when you move the pan but the edges should look set. Do not overbake them or they will become rubbery.
Step Nine: Sealing the Jars
As soon as you take the jars out of the oven wipe the rims with a clean damp cloth to remove any drips. Place the lids on top and screw the rings on until they are fingertip tight. As the jars cool down you will hear a popping sound which means the vacuum seal has formed successfully.
Step Ten: Cooling and Storage
Let the jars sit on the counter until they reach room temperature. Once they are cool you can store them in a cool dark place or put them in the fridge. For the best flavor let them chill for at least twenty four hours before eating so the texture can fully firm up.
Why This Recipe Is Special
This recipe stands out because it provides a level of convenience that most desserts simply cannot match. Usually a cheesecake is a temperamental thing that requires a lot of care and a very specific environment to stay good but by using the canning method you are creating a durable version of a delicate classic. It is also special because it allows for total customization since you can add different toppings to each jar before sealing them or leave them plain for a clean taste. From a health perspective these jars help with mindful eating because the size is fixed and you are less likely to go back for seconds when the portion is contained in its own beautiful glass vessel. The taste is also superior because the slow cooking in the water bath creates a uniform texture from the top to the bottom of the jar which is hard to achieve with a traditional large cake. Finally it is a wonderful way to reduce food waste because you can make a large batch and enjoy them over a long period rather than rushing to finish a whole cake before it gets moldy.
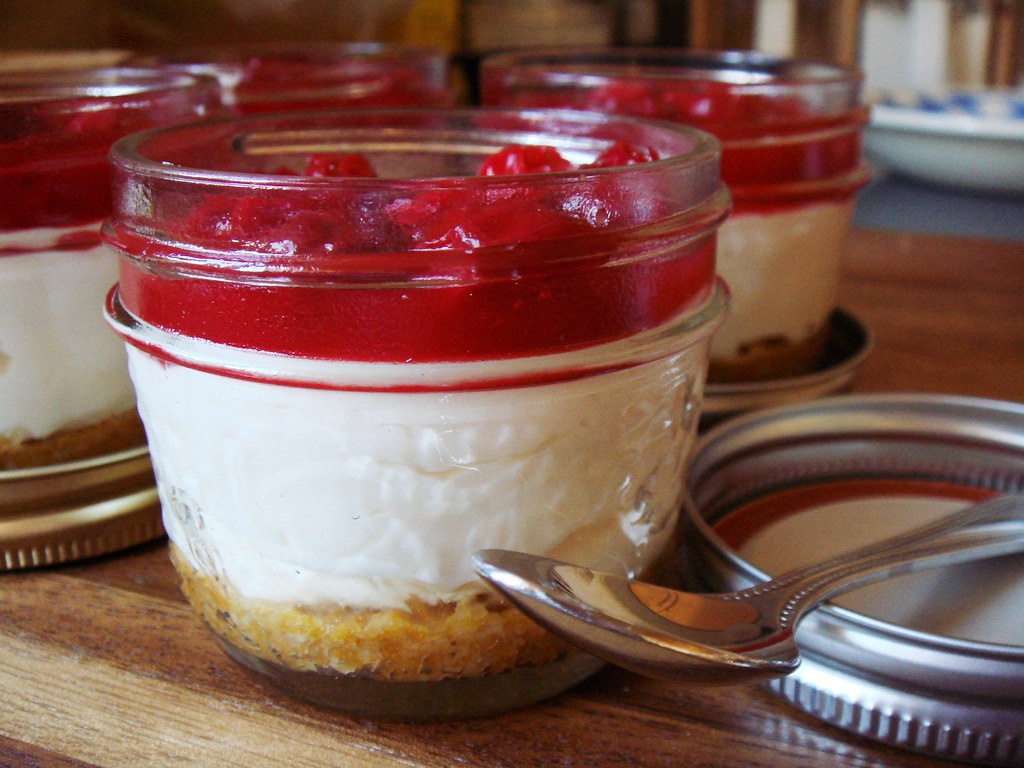
Extra Tips for Better Taste
To take your canned cheesecake to the next level you might want to try adding a layer of fruit jam or preserves on top of the crust before you pour in the batter. This creates a surprise burst of flavor in the middle of your dessert. Another great tip is to use high quality vanilla bean paste instead of extract if you want to see those beautiful little black specks and have a deeper aromatic experience. You can also experiment with the crust by using crushed ginger snaps or chocolate wafers instead of graham crackers to change the flavor profile entirely. If you want a very smooth top on your cheesecakes you can tap the filled jars gently on the counter before baking to release any trapped air bubbles. For an extra fancy touch serve these with a dollop of fresh whipped cream and a mint leaf right before you eat them. Remember to always use the best quality cream cheese you can find as the flavor of the dairy is the star of the show in this recipe.
Final Thoughts
Baking and preserving your own cheesecake in jars is a rewarding journey that brings a bit of luxury into your daily life. It is a project that requires patience and care but the result is a shelf of beautiful treats that are ready to make any moment feel like a celebration. Whether you are sharing them with family or keeping them all for yourself you will appreciate the hard work that went into every jar. This method proves that traditional kitchen skills can be adapted for modern needs in a way that is both fun and functional. We hope you enjoy every creamy bite of your homemade creation and feel proud of the skills you have learned today.
Nutrition Details
The following table provides an estimate of the nutritional content for one half pint jar of cheesecake. Please note that these values can change based on the specific brands of ingredients you choose to use.
| Nutrient | Amount Per Serving |
| Calories | 320 kcal |
| Total Fat | 22g |
| Saturated Fat | 13g |
| Cholesterol | 95mg |
| Sodium | 210mg |
| Total Carbohydrates | 26g |
| Dietary Fiber | 0g |
| Sugars | 18g |
| Protein | 5g |
Disclaimer
This recipe is intended for educational and entertainment purposes only. Everyone has a different body and unique health needs so the nutritional results and the way your body reacts to this food may vary from person to person. Please consult with a health professional if you have specific dietary restrictions or concerns about food safety and preservation. Always ensure your canning equipment is in good condition to prevent spoilage or illness.